If you need a tool that makes it easy for you to find the underlying contact information behind a website, Hunter.io is where you should look first. By pairing the Hunter.io extension with your Google Chrome browser, you’ll be on your way to landing new contacts in no time.
What is the Hunter.io Chrome Extension?
The Hunter.io Chrome extension is an outreach platform that quickly finds the email addresses associated with a website domain. You can use Hunter.io by installing it as an extension in Chrome, or by installing it as an add-on in Google Sheets. Today, we’ll focus on the former.
As a Chrome extension, Hunter.io adds a key timesaving functionality to your web browsing experience. It’s also legal and safe because the contact information that Hunter.io locates is all publicly available—it’s just hard to find sometimes, and that can become tedious if you need to do it regularly.
Thus, whether you’re a freelancer looking for new clients by pitching your services to businesses, a recruiter looking for expert candidates, or simply a marketer looking for outreach and cross-promotional opportunities, the Hunter.io Chrome extension is for you.
It not only finds publicly available professional email addresses, but it can also unearth a person’s professional information, including the following details:
- Name
- Company/organization
- Role/position
- Phone number
- LinkedIn URL
For each email address or piece of information Hunter.io finds, you’ll also receive a confidence score. The higher this number is, the more likely it is that Hunter.io has matched you with the right person.
Keep in mind that you can always find this kind of information on your own, but it could take a lot of time and energy to comb through various websites, web pages, and public-facing social media profiles to pin it all down.
That’s why Hunter.io is so useful, because it does the work for you.
How to Use The Hunter.io Chrome Extension in Five Easy Steps
Installing the Hunter.io Chrome extension is simple. You can find it by searching for “Hunter” on the Chrome Web Store, or you can use the shortcut on the platform’s own website. Today, we’re going with the latter because it redirects you to the web store anyway.
Step 1: Navigate to the Hunter.io Chrome Extension Page
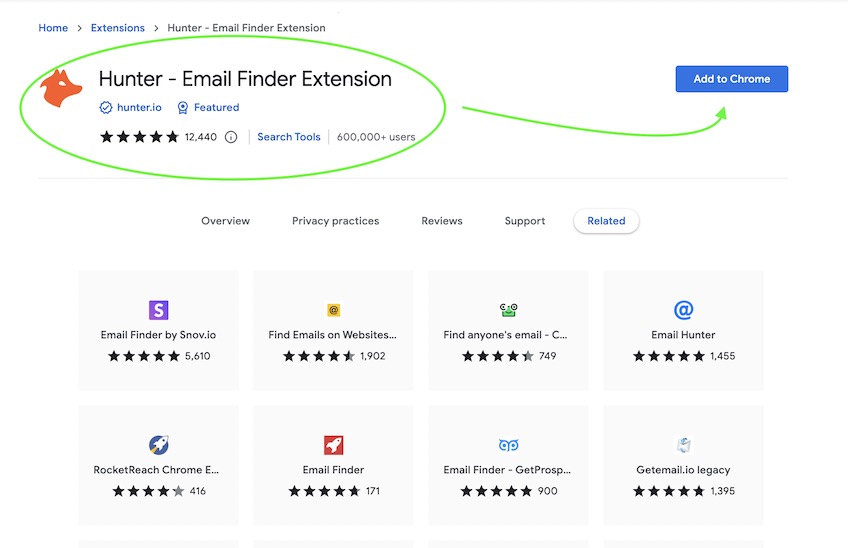
Make your way to hunter.io/chrome in your Chrome browser. Once there, you’ll find an orange button that says Add to Chrome (It’s free).
Click on this button.

Hunter will redirect you to the Chrome Web Store page featuring the Hunter.io extension.
Step 2: Add the Extension
Once you’re on the Chrome Web Store page featuring Hunter, click on the blue button that says Add to Chrome.
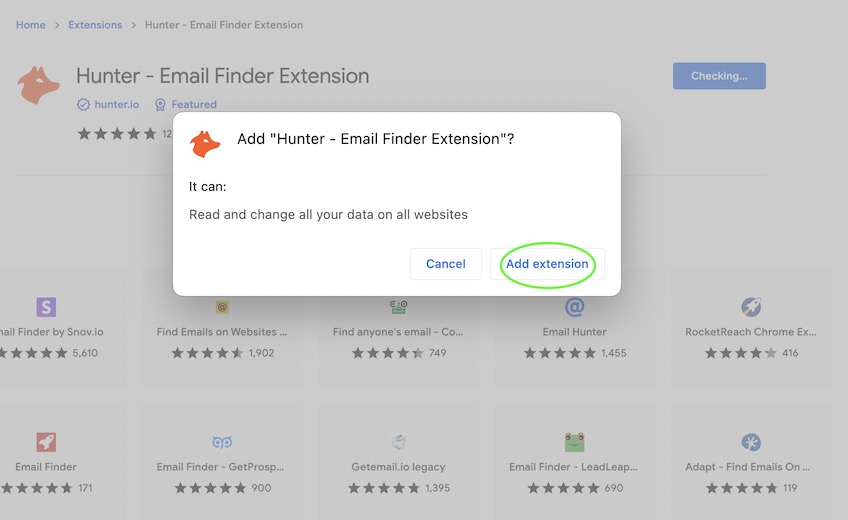
Hunter will ask you to confirm you want to add the extension by prompting you with its permission to read and change your data on all websites—which may sound scary at first, but it’s simply Chrome’s way of letting you know that the extension needs to be able to interact with the web pages you visit in order for it to work. That way, it can do its job of searching for the contact information you seek.
If you’re not sure about giving Hunter.io this level of access, you can always revoke it by changing your settings in Chrome later. We’ll show you how!
To continue, click Add extension.
Step 3: Create a Hunter Account
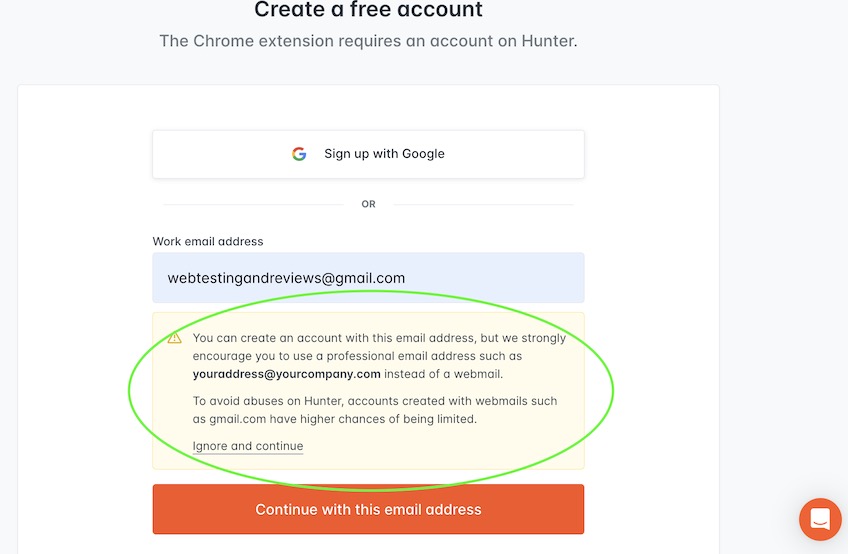
Once you’ve added the extension in Step 2, Hunter will redirect you to a page where you can create a free Hunter account with your email or sign up with an existing Google account.
Keep in mind that Hunter will suggest that you use a professional email address with a company domain rather than a personal email account from a webmail service like Gmail. This is due to certain safety restrictions that are sometimes placed on webmail accounts that get flagged for potential abuses of the platform.
After you create your Hunter account, you can start browsing with the active extension! You’ll automatically be enrolled in the free plan upon account creation, which offers 25 monthly searches and 50 verifications per month.
If you want more search and verification power, you can upgrade to one of Hunter’s paid plans. The paid plans also grant you perks like domain search, access to full lists of results, and CSV exports.
Step 4: Edit the Permissions
As a reminder, Chrome requires all of its extensions to request permissions from users before they’re added to anyone’s Chrome browser. There are three levels of permissions:
- High alert: This is when an extension requires access to all the data on your computer and on the websites you visit, which means it can basically access anything it wants—even personal files on your laptop’s desktop, for example.
- Medium alert: When an extension needs to be able to read, change, or ask for data from every web page you visit, which may include things like your bank account and social media profiles. You can give the extension a whitelist of specific websites it can read and modify.
- Low alert: When an extension asks to see or edit things like your physical location, your browsing history, your copy/paste clipboard data, and your bookmarks tab.
Different extensions require different permission levels, and it’s always in your best interest to monitor the permissions levels of any app or extension you add to your browser. Hunter.io is a medium alert extension.
That said, Hunter.io is also a verified extension with a strong safety record.
Chrome verified extensions come with a checkmark from Google and are generally considered safer than non-verified programs.

For a closer look into the extension, the creators of Hunter have outlined why it needs the requested permissions in a full statement.
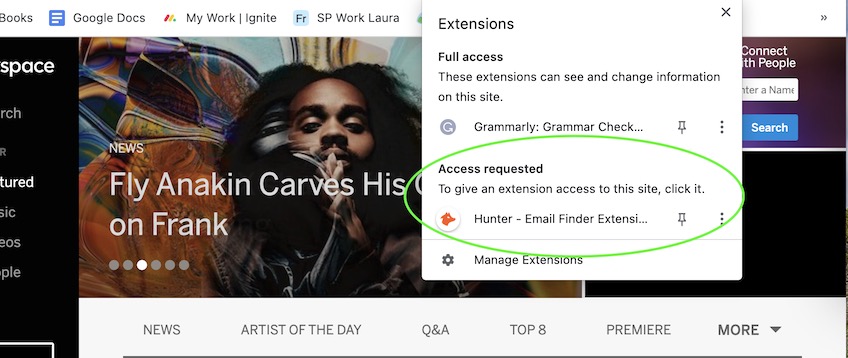
If you want to limit the data that Hunter can gather, click on the Hunter – Email Finder Extension icon in the upper right-hand corner of your Chrome menu bar. Next, click the three vertical dots to the right-hand side of the dropdown menu. You’ll see an option that says This Can Read and Change Site Data.
Click on that to bring up a few options.
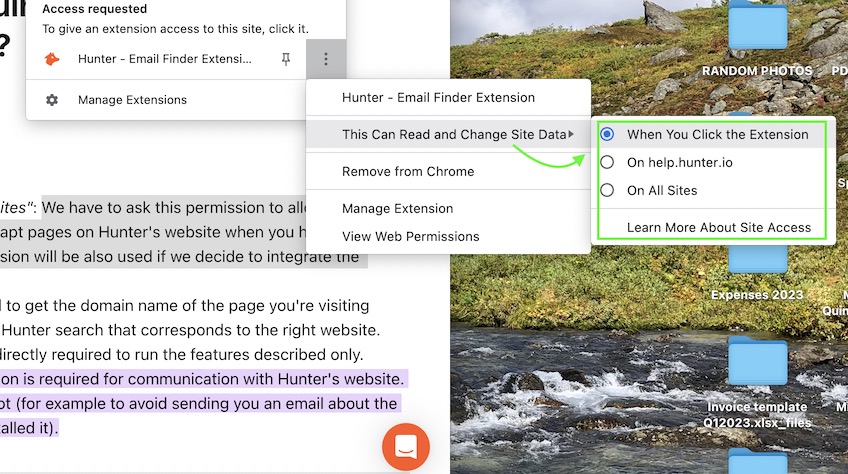
Here, you can set Hunter to read and change site data only when you click on the extension—which is good for peace of mind, but it can also be annoying because it forces you to approve each website manually.
If you value limiting the data that extensions can access, though, it won’t be too much of a problem. Plus, if you pin the extension to your Chrome menu, you won’t have to click on the Extensions icon (the puzzle piece) each time.
If you return to the three vertical dots menu within the extension, you can also create a custom list of websites that Hunter can access instead of activating upon clicking the extension icon.
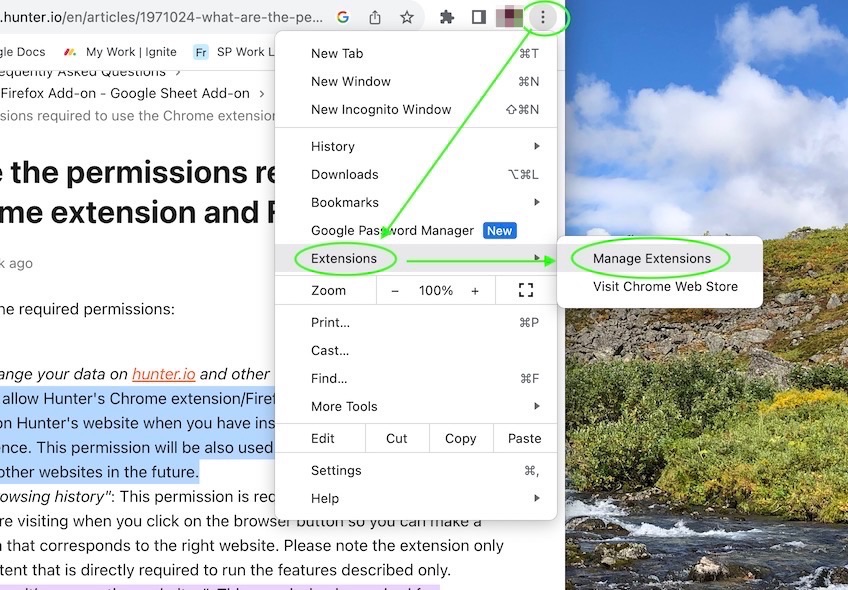
Another way of accessing this is by clicking on the three vertical dots on the upper right-hand side of your Chrome screen. Hover over Extensions in the dropdown menu and then choose Manage Extensions.
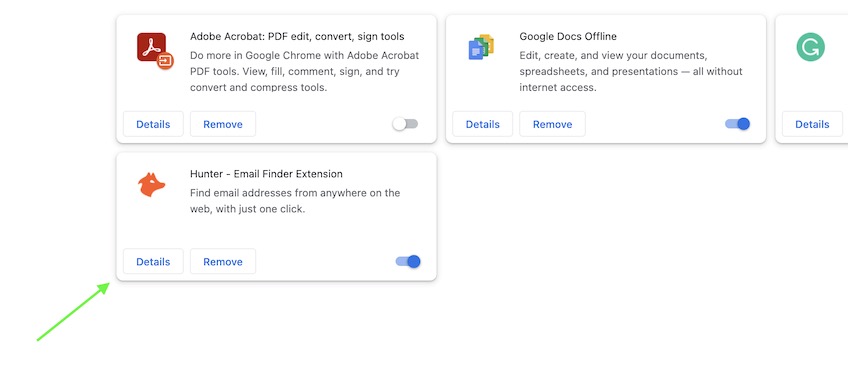
On the following page, locate the Hunter extension card and click on the Details button.
Here you’ll see all the settings for your Hunter extension—and under the Site Access section, you can manually add websites to your approved list.
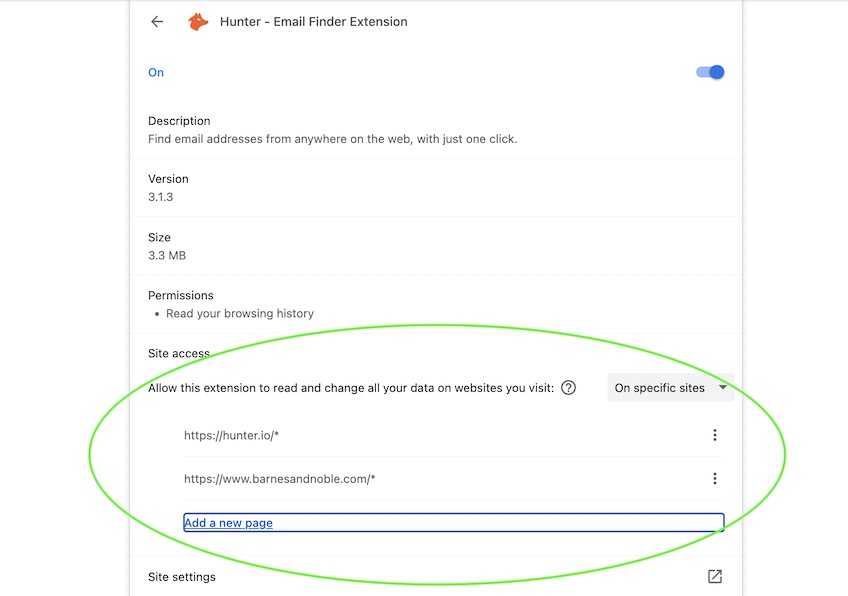
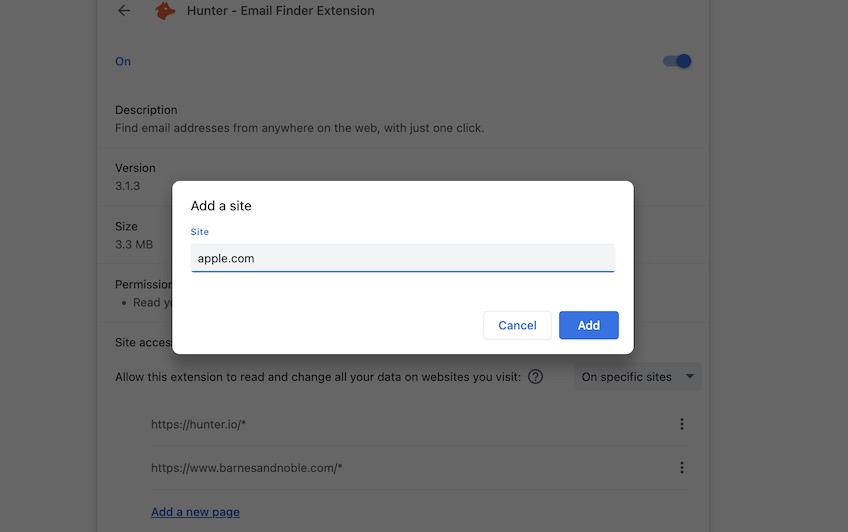
In our experience, this worked seamlessly. After adding apple.com as an approved site, we were able to use Hunter.io on Apple’s website without any extra clicking or reloading.
However, if you want to visit multiple pages within a site to look for contact information, you’ll have to add each page as an individual site on the Chrome extensions manager. However, you may find that apple.com would give you the same contact info as support.apple.com/ipad, for example.
Step 5: Hunt for Contact Information
Now for the fun part! It’s time to use Hunter to pin down all the contact information you need.
Let’s say you’re a freelance graphic designer, and you want to contact software companies to see if they could use your services.
Here’s what you can do:
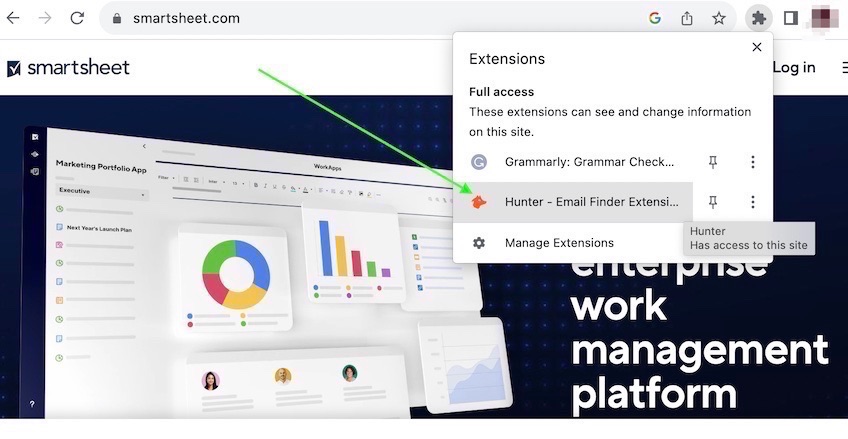
First, use Chrome as your browser and navigate to the webpage with the software company you want to work with. We visited Smartsheet’s website as an example.
Next, click on the Extensions icon in the upper right-hand corner of your Chrome browser.

Next, click on the Hunter – Email Finder Extension. (Again, if you already pinned it to your Chrome menu, you’ll already find it next to your URL bar.)
Now Hunter should pop up in your browser window with a list of available names, email addresses, and job titles, as well as the sources that show you where the information came from.
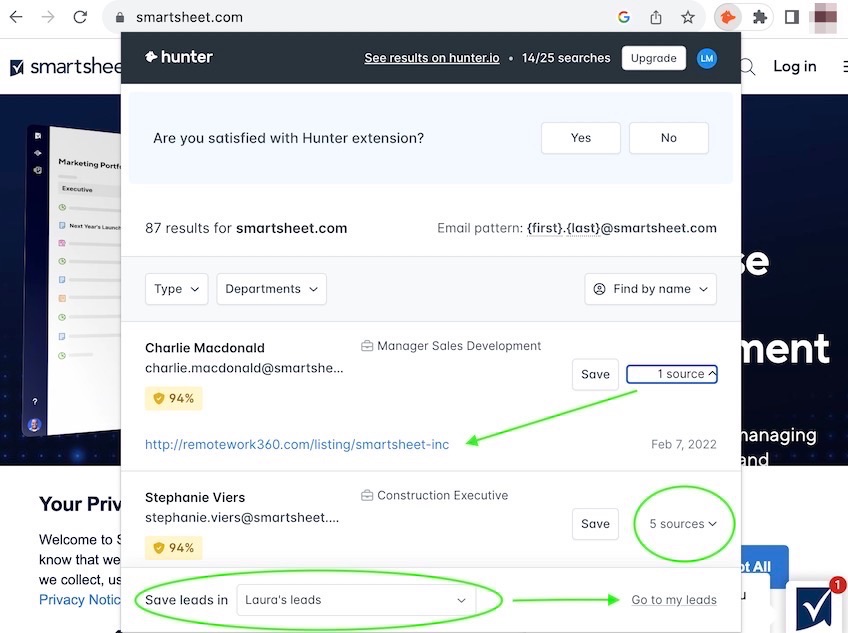
If you click Save next to a contact source, Hunter will begin to build a list of all your saved leads. You can then click Go to my leads at the bottom to see all your saved email addresses and names on the Hunter dashboard.
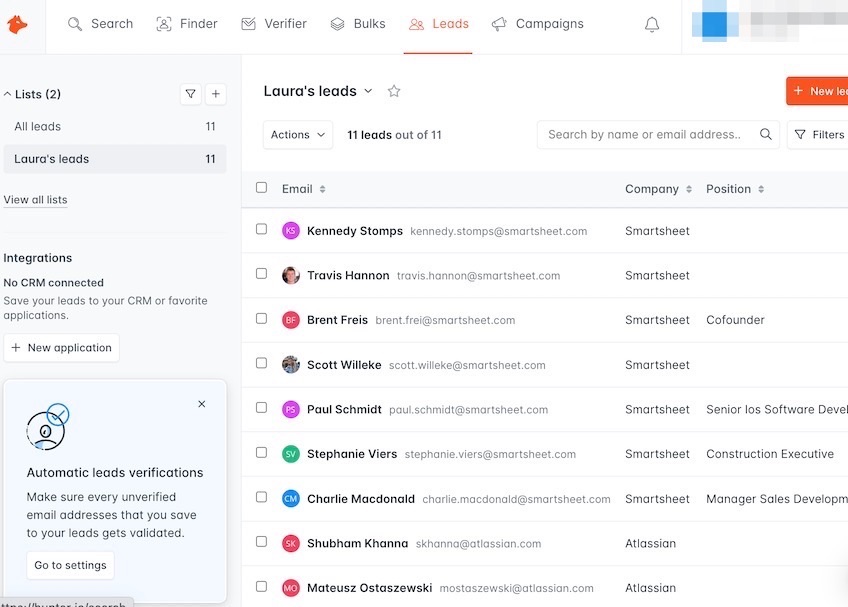
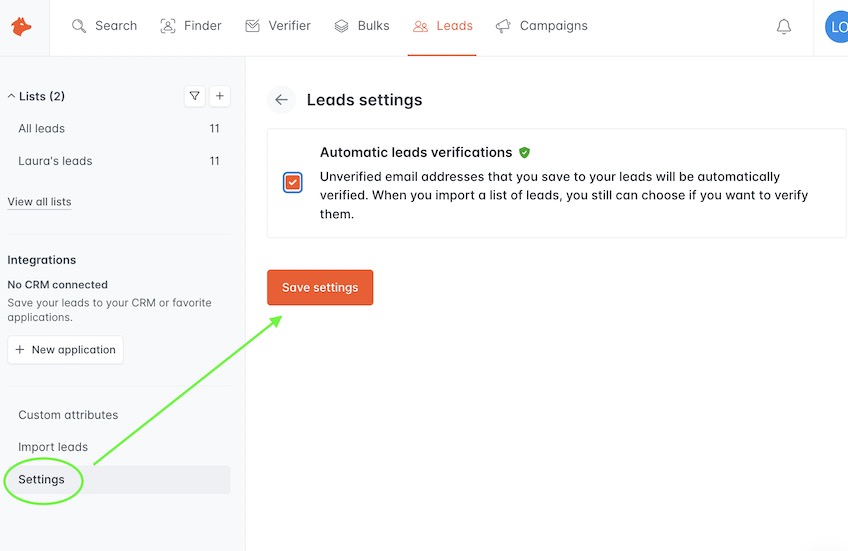
Once you’re on the dashboard—and before you start cold-pitching potential clients—you may want to verify each email individually with Hunter’s Verifier tool. However, you can also set Hunter to verify emails for you automatically.
To verify the emails, Hunter performs several checks to make sure an email address is legitimate.
To enable automatic verification, go to your Leads page and click the Settings button in the lower left-hand corner. You’ll be directed to a page where you can check a box that says Automatic leads verifications.
Tips and Tricks for Using the Hunter.io Chrome Extension
Ready to start email hunting? Here’s a few ways to get the most out of the extension.
Tip #1: Integrate Hunter with Your Favorite Tools
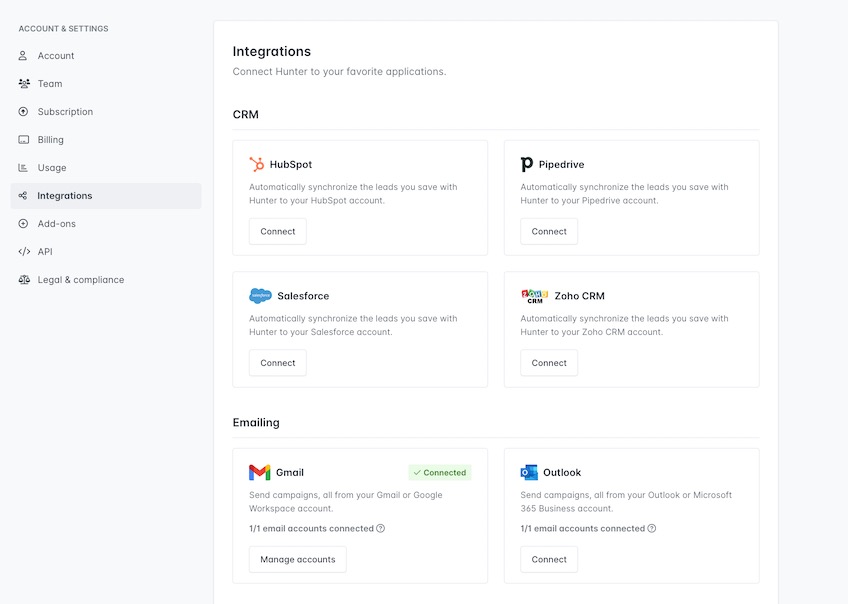
To expedite your workflow, you can connect Hunter to your favorite email and CRM tools, such as Pipedrive, Salesforce, Gmail, and Outlook.
To find these integrations, click on the dropdown menu in the upper right-hand corner of your Hunter dashboard. On the list of options, click Integrations.
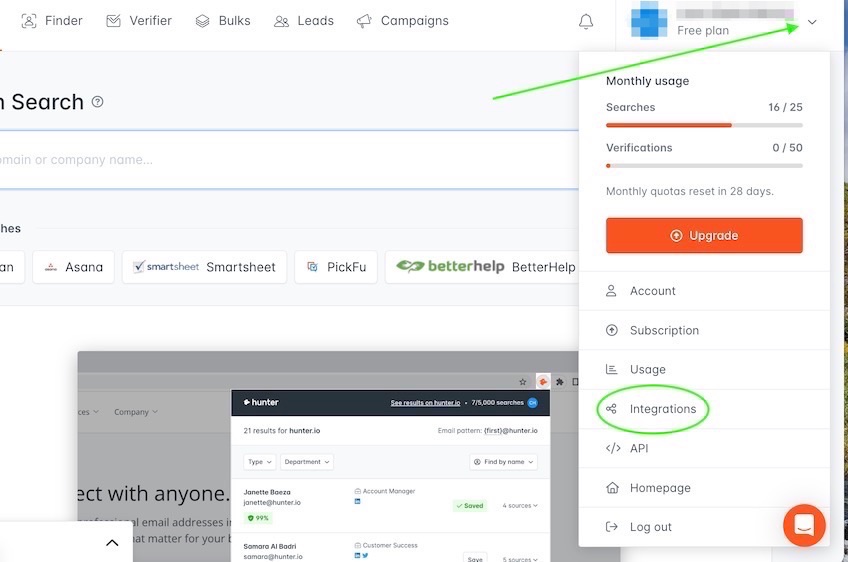
Here you’ll find all of the available integrations. Click the Connect button on any integration to get started.
Tip #2: Create a Hunter Campaign
When you’re ready to start contacting leads, Hunter offers a campaign dashboard where you can create and send emails right from within the Hunter platform.
Click on the Campaigns button on your Hunter.io toolbar to open the campaign dashboard.
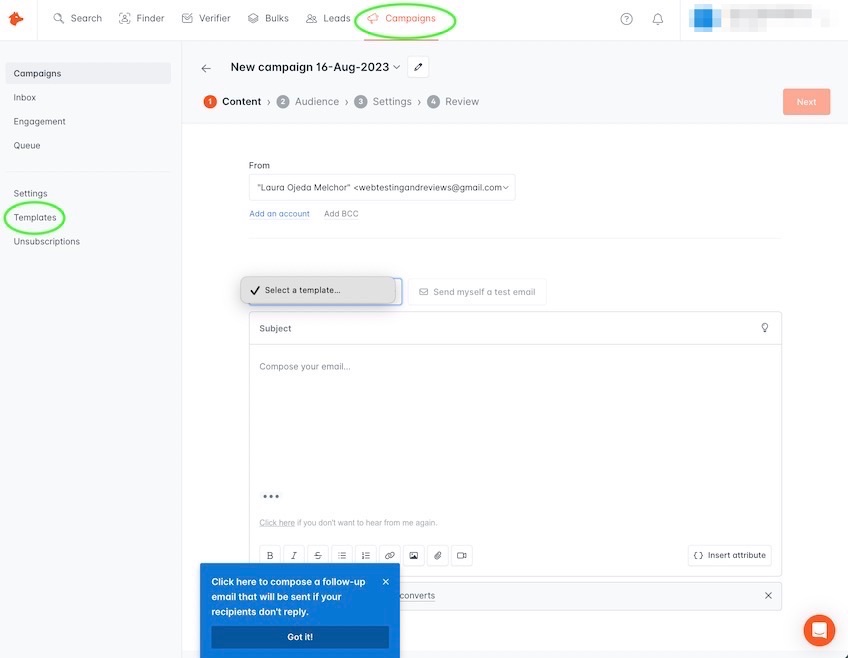
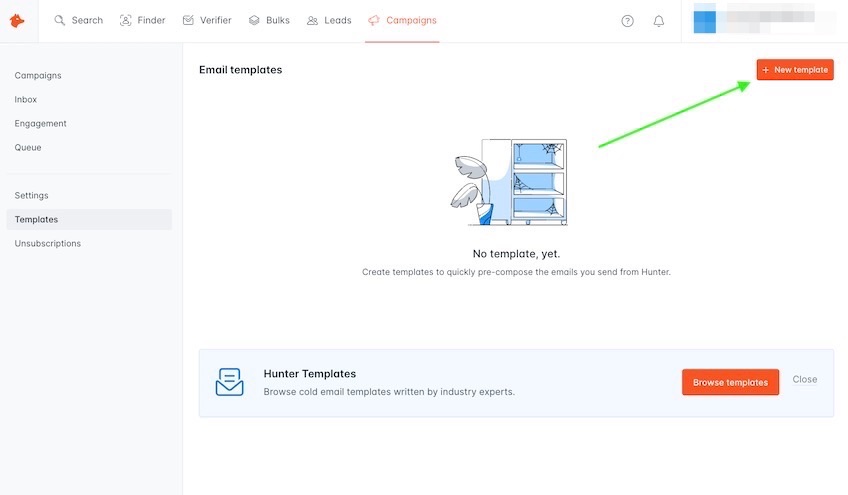
Here, Hunter also gives you tools to manage your settings, create templates, and see who has unsubscribed from your campaigns.
The templates feature is great for getting your creative juices flowing. If you’ve spent any time cold pitching, you’ll probably want to save a few different templates that you can tweak for each new campaign. This means you won’t have to hunt through your old emails, notes, and docs to find previous letters you’ve already written.
Tip #3: Browse the Hunter Blog for Cold-Pitching Tips
Blasting out cold emails is a great way to make new connections, but it can be intimidating as well.
That’s why we love Hunter’s blog, where you’ll find articles on everything from the 48 spam trigger words to avoid using in your emails to strategies for personalizing cold email outreach pitches so they actually get clicked on, opened, and read.
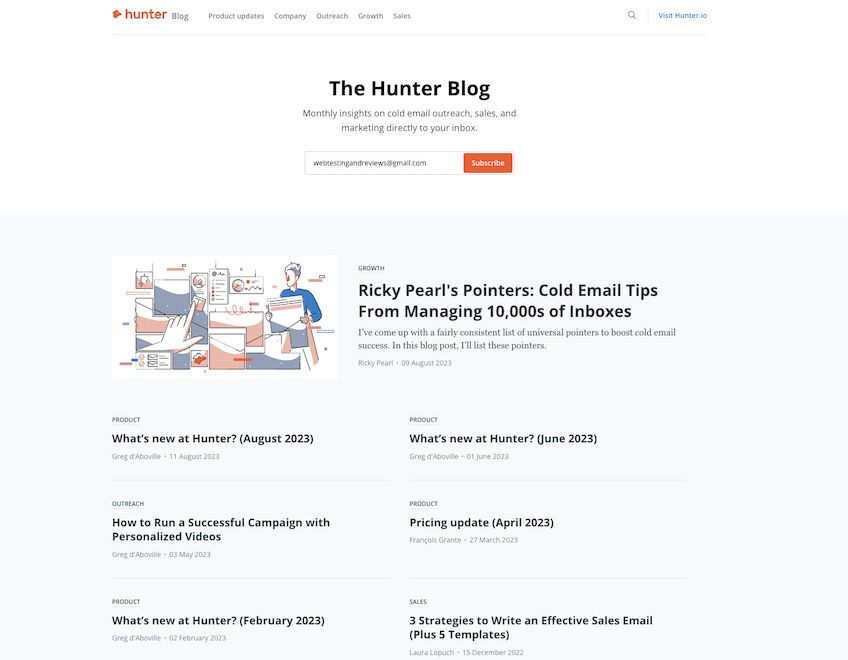
You can even get Hunter’s latest insights delivered directly to your inbox.
Final Thoughts About Using the Hunter.io Chrome Extension
If you’re looking to save time on the repetitive tasks associated with finding new leads and building new email lists, the Hunter.io Chrome extension is a no-brainer. As long as you know which sites and companies you’re looking to make contact with, Hunter can take the chore out of uncovering who to reach out to and how.
With this step-by-step tutorial, you’ll be on your way to finding what you need in no time. To learn more about this savvy tool, take a look at our full Hunter.io review.