Making an impression on your website visitors is important, and one way to do that is by having a unique favicon. A favicon, short for favorite icon, is the tiny icon that appears next to your website’s name in an open browser tab. It’s a small but important way to elevate your online presence by adding a memorable design flair to your website.
If you’re new to the world of favicons and want to create your own, it might feel a little intimidating to get started. But the process is simple and doesn’t even require a logo or any design experience.
You can create your very own brand-focused favicon in less than an hour—really.
And we’re here to help keep the process simple and streamlined. From providing a clear definition to walking you through the design and implementation stages, we’ll show you exactly how to create an eye-catching favicon and upload it to your site in just a few easy-to-follow steps.
What’s a Favicon and Why Is It Important?
A favicon is a small, usually 16×16 pixel icon that represents your brand and website. This icon, which most commonly displays itself on the tab bar of a browser, helps site visitors to visually identify your brand once they’ve visited your site.
The screenshot below shows how favicons appear in the tab section of a browser.
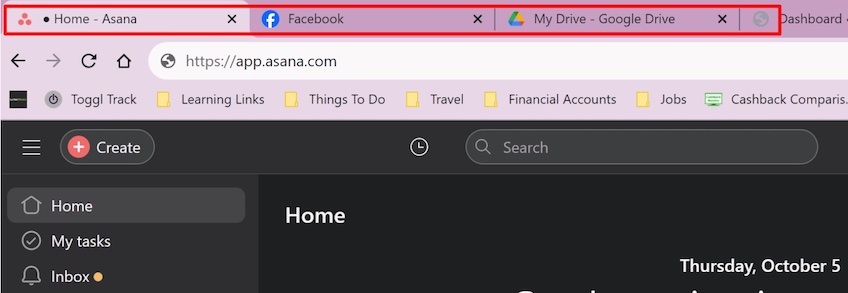
As you can see in the above image, the icon furthest to the right is a gray globe. This is the default favicon for the browser. So if you haven’t added a custom icon, this is what will appear when people visit your website.
This isn’t good for your website because a generic icon doesn’t actually tell visitors anything about your brand.
If a user is quickly skimming their browser tabs to find your page, a generic icon may cause them to overlook your site, potentially close the tab, or even visit a competitor’s site instead.
Your favicon is also helpful for when users bookmark your site, as the icons will show up next to each of your bookmarks.
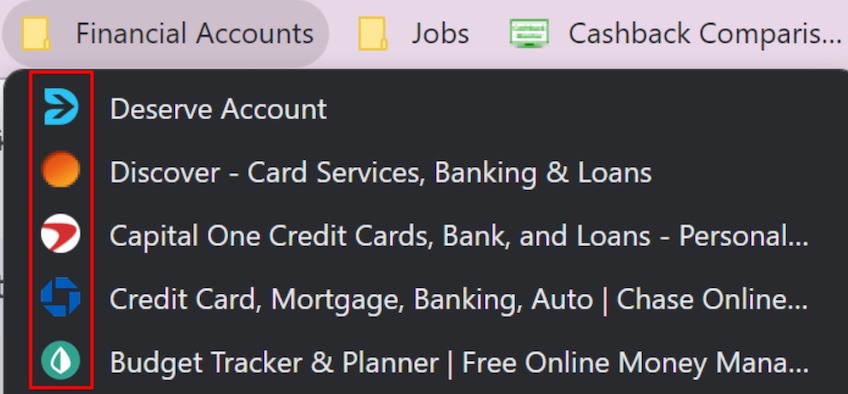
As you can see in the image above, the favicon helps for easy identification on a browser bookmark bar. And since people use bookmarks for quick access, they want to be able to find your page within a matter of seconds by skimming the icons.
Benefits Of Using a Favicon
So why should you take the time to create a custom favicon for your website? Here are a few of the benefits:
- It makes your brand recognizable to visitors
- It adds a professional and cohesive touch to your website
- It sets you apart from competitors who may not have a unique favicon
- It could lead to longer site visits and lower bounce rates
How to Make a Free Favicon From Scratch
It can take a lot of time and money to create a website. But the good news is that you don’t need to pay anything to make a favicon, and it doesn’t take very much time at all. We’re going to demonstrate the process with the free and easy tool RedKetchup.
The company’s Favicon Generator tool allows you to personalize fonts, colors, and corners. It also provides you with the necessary HTML code that makes your favicon compatible with all browsers.
This tool is specifically used for making text-based logos, which offer a clean clear favicon when paired with brand or site colors.
So let’s get started!
Step 1: Open a Free Favicon Generator
Since we’re starting from scratch, we’re assuming there’s no preexisting logo to create a favicon from.
So in this example, we’ll create a favicon with the brand initials as the main image.
First, visit the RedKetchup Favicon Generator and select Generate the favicon icon from text.

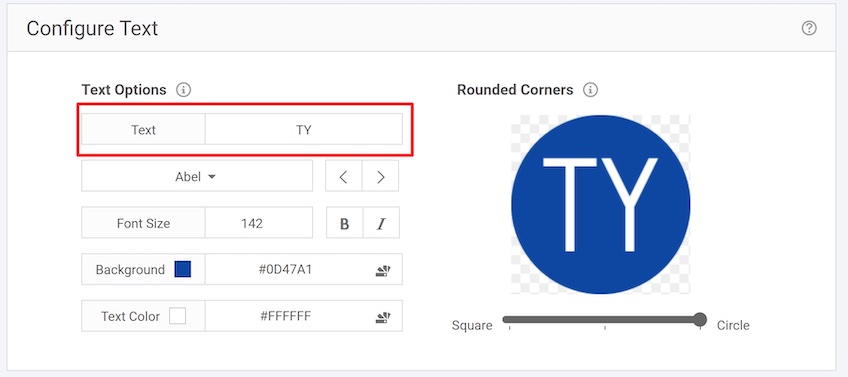
Step 2: Add your text
Using text is a great way to get started with favicons. They are clear, easy to read, and are simple to design in comparison to image-based favicons.
In the Text Options box, type your desired text into the field.
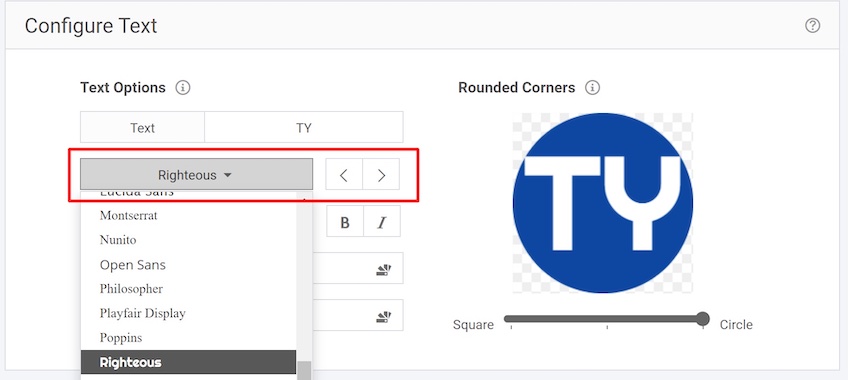
Step 3: Choose your font
Next, select the font drop-down menu below your text box to find a font you like.
Step 4: Adjust your font
Now you can tweak the font size and bold or italicize your font with the controls directly under the font drop-down menu

Step 5: Change the shape of your favicon
Drag the sliding toolbar towards “Square” or “Circle” to create the overall dimension of your favicon. You may need to go back and readjust the font so that it fits your desired shape.
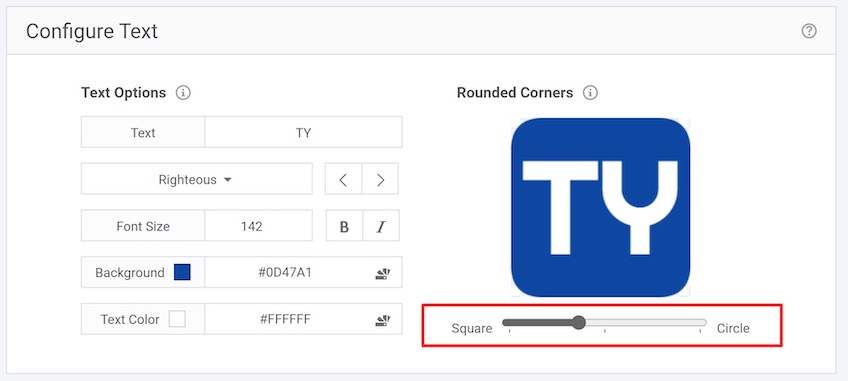
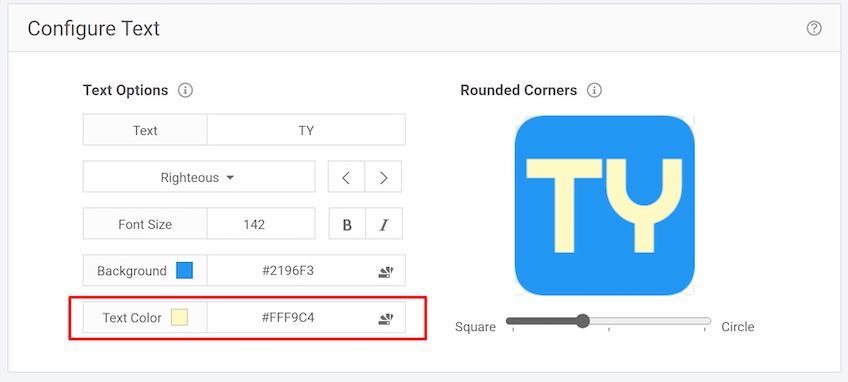
Step 6: Adjust the background and text color
Now you can adjust the colors. We suggest you use brand colors or colors used on your website for cohesion.
Click on the color palette icon for a drop-down menu of color options or insert a specific HEX code if you already know which colors you want to use.
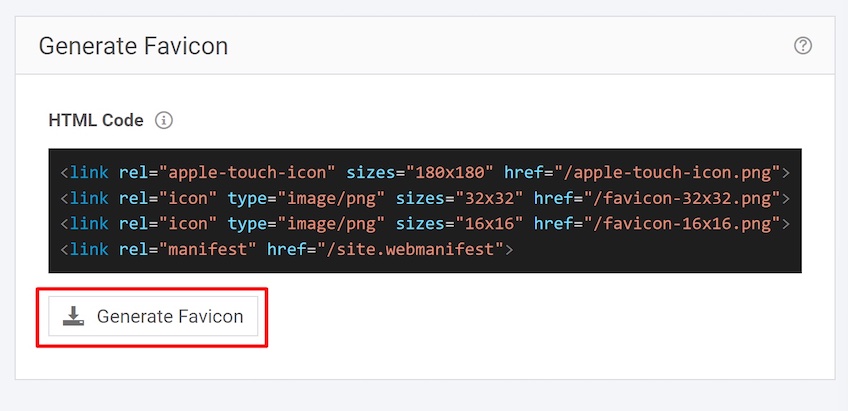
Step 7: Download your favicon
Now, select the “download favicon” button. A zipped file with everything you need to upload your favicon will be saved to your preferred folder.
To set up the favicon, unpack the files you’ve downloaded into your website’s root directory. Then, insert the produced HTML fragment into the portion of your webpage’s coding.
Using an Image or Logo as a Favicon
If you’re going to use your brand’s logo or make a custom image your favicon, it’s important to make sure the design is easy to view and that it will look good at multiple resolutions.
While 16×16 pixels is the generally accepted favicon size, there are several other dimensions you will want to consider for other platforms:
- Internet Explorer: 24px
- Taskbar button in Windows and new tab page in Internet Explorer: 32px
- iOS phone home screen: 72px
- Google TV icon: 96px
- iPhone 4 and newer versions’ home screen: 114px
- Chrome’s web store: 128px
- Opera’s speed dial: 195px
As you can see, having a slightly larger icon may give you more flexibility in where it can be used.
In addition to dimensions, there are a few additional best practices to keep in mind for the best possible results when using an image as a favicon:
- Keep it simple: Using detailed images may be a good idea for logos and site design, but when it comes to favicons, they may be unrecognizable at such a small size. Use images with clear, simple shapes and minimal details.
- Use the right image file type: It’s best to use PNG or ICO formats when editing your favicon image. These formats allow for background transparency and offer the best quality image overall.
- Choose bold colors: Your favicon needs to stand out on both a white and black background, so make sure to use bold, contrasting colors for optimal visibility.
- Make sure your favicon is aligned with your brand: If your favicon looks totally different from the images, colors, and fonts used on your site, it may be confusing for users. So make sure to use similar elements to your brand identity for consistency.
- Test your favicon: You’ll never know exactly how your favicon will look until you have it in action, so make sure to test it on different platforms and be willing to redesign it if it isn’t working as effectively as you’d like.
How to Add a Favicon to Your Site
To add a favicon to your website, start by saving your chosen image in the root directory of your site. This is often the same location where your website’s index.html file is located.
Next, you’ll need to insert some HTML into the head section of your website’s code. The specific HTML code will depend on the file format of your favicon. For example, if you’re using a .png file, the code might look like this:
<link rel="icon" type="image/png" sizes="32x32" href="/favicon-32x32.png">Replace “favicon-32×32.png” with the actual name of your favicon file. If you have different-sized favicons, include similar lines of code for each one.
You can also add your favicon through your cPanel web hosting provider. See their websites for specific instructions on how to add it.
To ensure your new favicon looks as expected, clear your browser cache first and then load your website. The favicon should appear next to your site’s title in the browser tab. It’s also a good idea to check how it looks on different browsers and devices, as appearances can vary.
How to Add a Favicon to Your WordPress Site
Here’s a quick walkthrough of how to add your favicon to a WordPress site with a method that doesn’t require HTML:
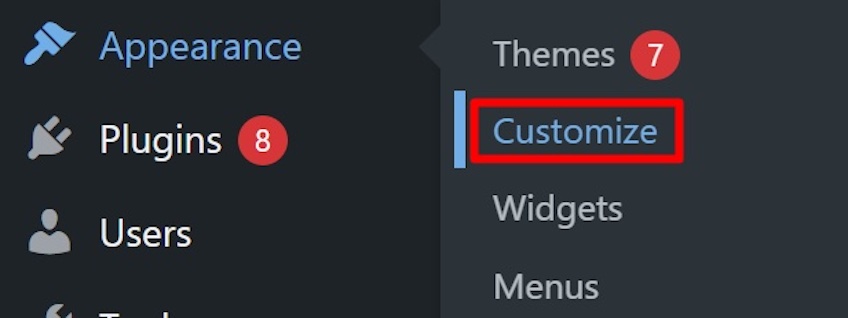
Step 1: Go to appearance settings
Log into your WordPress Dashboard. On the left-hand menu, select Appearance and click on Customize.
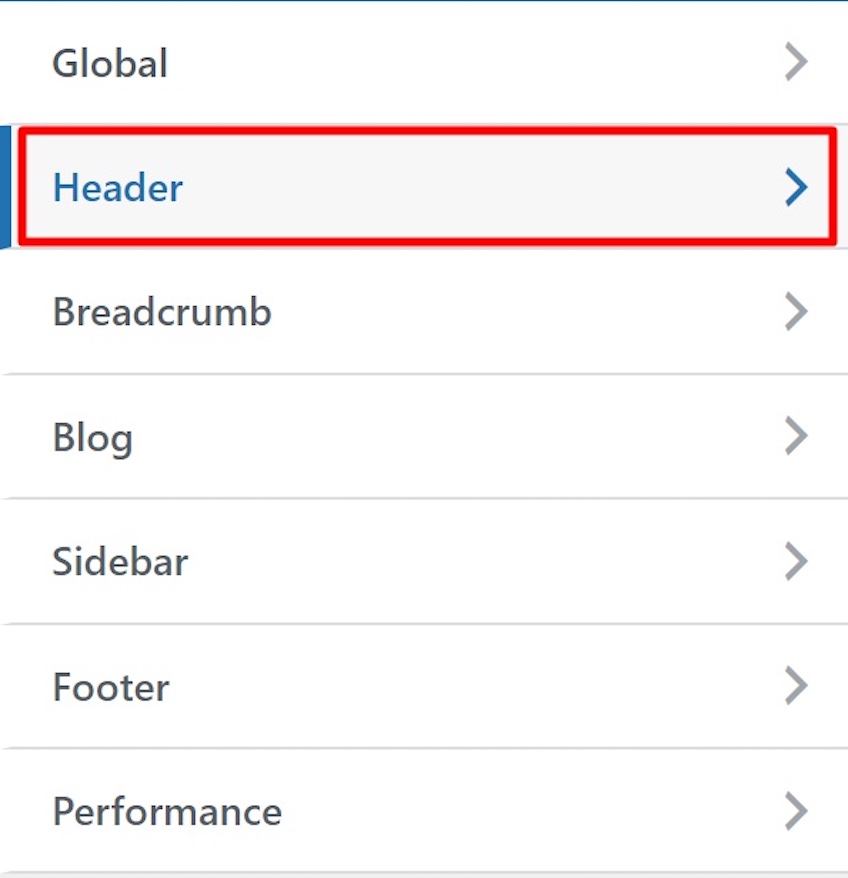
Step 2: Select the header settings
In the customize page, select the Header option on the left-hand side.
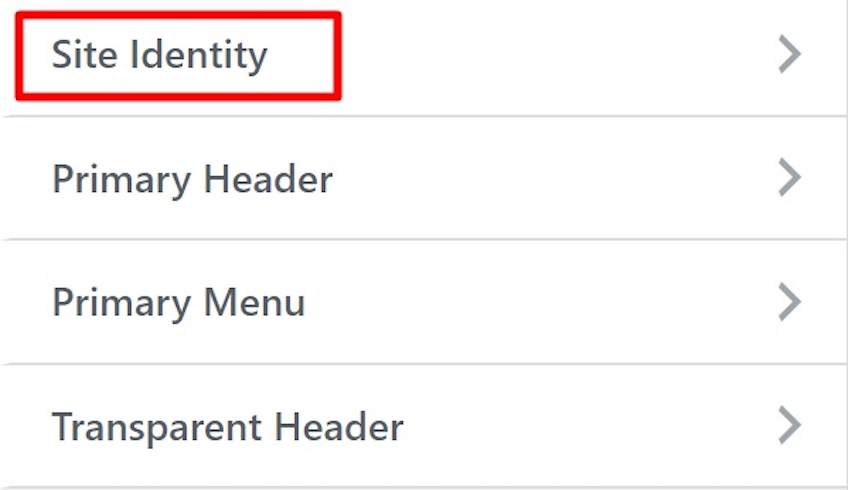
Step 3: Choose site identity
Now that you’re in the header options, select the Site Identity tab.
Step 4: Upload or change your site icon
Scroll to the bottom of the site identity options. Click the button that allows you to add or change your icon.
This was demonstrated on the Astra theme, and many other WordPress themes allow you to add an icon in the same way.
But if your theme doesn’t support icon and favicon customization, you can also use a plug-in.
Try RealFaviconGenerator or All-In-One Favicon for an easy way to add your image or text icon to your site.
Key Takeaways For Making Your Own Favicon
Favicons can elevate the overall look of your website and help with brand recognition. And by using free tools that make creation and installation a breeze, you can have yours set up in under an hour.
Remember, a favicon can only help your brand if it’s attractive, easy to read, and visible on all browsers. So be sure to take the extra time to customize it for your website’s look and feel. Make sure your image is clear, bold, aligned with your website, and attractive.